OPI FINALLY Has Glue On Nails!
I’ve been saying for years that I’m shocked OPI and Essie don’t have glue on nails. Well, OPI finally has them! They’re called the OPI xPRESS/On and of course, I had to test them for you. Below I have my thoughts on the new nails and my application video.
These are *glue* ons not the OPIx Impress press-ons- I tried those and was not a fan. See my full review here.
Watch my review here:
OPI xPRESS/On Facts:
- They can last up to 14 days
- They’re reusable
- Tips and packaging are made with up to 94% post-consumer recycled materials
- No animal-derived ingredients
- They cost $13 and come in many of OPI’s cult classic colors like Bubble Bath (what I tried), Funny Bunny, Cajun Shrimp, Lincoln Park after dark, & many more!
What comes in the set?
- 30 Nails
- Nail Glue
- Cuticle Stick
- Dual Nail File and Buffer
- OPI Prep Pad
How To Apply OPI xPRESS/On
- Fit: Cover your natural nail with each press-on to find your perfect size, ensuring you align the number with your natural nail tip.
- Prep: Clip or file nails as needed and lightly buff your nail surface. Remove dust and debris from nails with the Prep to xPRESS pad, then gently push back cuticles.
- xPRESS: Remove the glue cap and gently squeeze the bottle. For longer wear, apply glue to the back of your press-on nail and your natural nail. For short-term wear, only apply glue to your press-on nail.
- 30 seconds!
My thoughts on OPI’s new glue on nails:
The application is pretty straightforward. The buffer side of the file didn’t do much so I used the rough side on my nails instead. The glue grabs hold quickly and isn’t messy or runny- I really appreciated that! I LOVE the shape- they look exactly like Static nails.
I wouldn’t be able to get two full sets out of them because I used a lot of the middle sizes in the kit, that’s one thing I like about Olive & June Glue ons– they come with over 40 nails so you really get a lot of bang for your buck BUT their glue isn’t nearly as easy to use as the OPI one. I suggest keeping a glue you like around until it runs out you can mix and match glues and nails.
How long did the OPI glue-ons last?
They lasted 7 days on me (my middle fingers came off sooner but I glued them on without any issues). When my thumb started lifting on day 7 I decided to take them off. Removal was VERY easy and didn’t damage my nails. If you do struggle with removal just soak your nails in warm water for 10 minutes and try to pry them off with the cuticle stick. If they’re still not coming off then you can apply acetone around the cuticle and let it soak into the sides then pry them off.
The nails are definitely reusable too! The tips still looked shiny and intact after 7 days.
I 100% recommend the OPI xPRESS/On nails! They are incredibly easy to use and look great.
If you’ve tried these or any other brands you’ve loved lmk in the comments!
If you enjoyed this post subscribe to my email list to get updates from me once a month!
Must-Have Nail Items
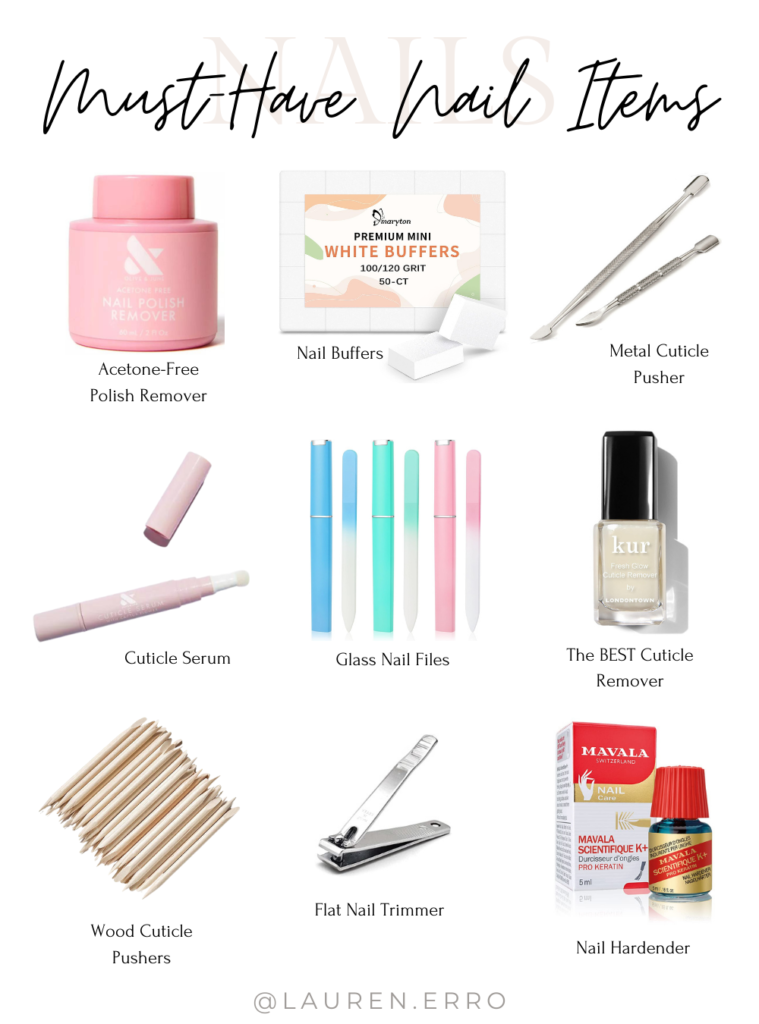
Here are the tools and products that I swear by to keep my nails healthy and in great shape. I like to do my own manicures at home, and these product do the trick to make my manicures last!
DIY Manicure Tips:
Whenever you do your own manicure I always recommend a few steps before you start painting.
1. Trim and file your nails. These nail files are THE BEST. They make your nails feel so smooth.
2. Clean up your cuticles. This cuticle remover is a little pricey but it works so incredibly well. I like to use these push sticks. *Never cut your cuticles it leads to hangnails and possibly infection.
3. Buff your nail plate to smooth the surface of your nails. This buffer is the best option.
4. Wash your hands and wipe with acetone or alcohol. This ensures that there is no remaining oil left on your nails that will get in the way of your manicure lasting as long as possible.
5. Apply base coat. Some of the brands below require specific pre-polish steps- I’ll flag them so you are aware.
6. Apply a coat of polish and wait a few minutes for it to dry before applying the next coat. Repeat until you get the coverage you like.
7. Apply top coat and for the best result brush it over the edge of your nail to ensure everything stays as long as possible.
8. Apply cuticle oil or serum as needed. I like to apply it before bed.
Bonus: If you have thin/ weak/ peely nails this nail hardener helps SO MUCH!
xx,
Lauren
Do you follow me on Amazon? I post all of my favorites on there & update them regularly! Check it out HERE!


